
 SA329 & 140/4 (47 ov)
 AUS429
 BAN272
 WI134/4 (48 ov)
 FRO1
 LEC0
 NSR0
 KHO0
 RIY0
 QAD0
 FIO
 ATA
 NZ
 IND
 NAM
 IRE
 Abha
 Al Ittihad
 NorthEast
 Bengaluru
 Al Diriyah
 Neom SC
 Le Havre AC
 PSG
 Nice
 Rennes
 KHA4
 HAZ2
 AFG221/7
 ZIM202/5 (20 ov, target 222)
 ENG386/5
 SL331 (45.1/50 ov, target 387)
 UAE199/6 (47.3/50 ov, target 197)
 OMA196
 WELL
 OTAGO
 SBP172 & 165/7 (59.4 ov, target 237)
 MITS112 & 296
 SOA154
 WA406/5d & 79/6 (29 ov)
 NED
 BH-W
 SS-W
 AS-W
 MS-W
 MIS
 TOK
 HKG
 SCOT
 IND-W133/2 (17/50 ov, target 132)
 ZIM-W131
 MOW185/3
 VAG90/9 (20 ov, target 186)
 SWD158/7 (18.3/20 ov, target 158)
 TITNS157/6
 NUM1
 OVI0
 MERC1
 WU0
 HAM0
 SIR0
 KOZ0
 UTR0
 VIE0
 JUV0
 PFC1
 BK0
 BAL0
 ELD0
 CAL0
 OSA0
 COR0
 ZAM0
 Al Shabab
 Al Ahli
 Elversberg
 Mainz
 Genoa2
 Juventus0
 Monza1
 Napoli4
 Milan2
 Bologna4
 Parma0
 Udinese0
 Venezia0
 Inter Milan2
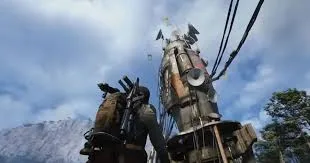
Deep beneath the war-torn Spaceport lies a simple valve that could be your ticket to quick rewards. The Switching the Supply quest in ARC Raiders might sound complex, but it’s actually one of the most straightforward missions in the game—if you know exactly where to look. This underground objective offers generous rewards for minimal effort, making it a must-complete task for both new and veteran raiders.
ARC Raiders Quest Breakdown
| Quest Details | Information |
|---|---|
| Quest Name | Switching the Supply |
| Primary Location | Spaceport Underground Tunnels |
| Main Objective | Locate and turn the valve |
| Difficulty Level | Easy |
| Risk Factor | High (PvP hotspot) |
| Completion Time | 3-5 minutes |
| Recommended Gear | Light armor, basic weapons |
Complete Walkthrough: From Surface to Success

Step 1: Navigate to Spaceport Tunnels
Your adventure begins at the Spaceport, one of the most contested points of interest in ARC Raiders. Head toward the Launch Towers—these towering structures serve as excellent landmarks for navigation. Position yourself to the left side of these towers, scanning the ground carefully for signs of structural collapse.
The tunnel entrance is characterized by caved-in ground creating a natural access point to the underground network. This isn’t a clean entrance—it looks like the earth gave way, revealing the infrastructure beneath. Once you’ve identified this breach, descend into the darkness below.
Pro Tip: Before entering, survey the area for hostile players. Spaceport attracts raiders like moths to a flame, and going in blind could end your run prematurely.
Step 2: Locate the Critical Valve
Once underground, you’ll find yourself in a dimly lit tunnel system. Don’t be intimidated by the maze-like appearance—your objective is straightforward. Begin moving deeper into the tunnel, keeping your right side in focus.
After traversing a few meters, watch for a distinctive yellow pipe running along the right wall. This industrial piping is your beacon. Mounted on top of this yellow pipe, you’ll spot a red valve—your mission objective. The color contrast makes it relatively easy to identify even in the tunnel’s low-light conditions.
Step 3: Turn the Valve and Complete the Mission
Approach the valve and press and hold your interact button. You’ll see an animation of your character turning the valve, redirecting the supply lines. The moment you complete this action, the entire quest automatically finishes, crediting you with completion rewards.
The simplicity is refreshing—no multi-stage objectives, no backtracking, just one decisive action that wraps everything up instantly.
Navigating the Danger Zone: Spaceport Survival Tips
Here’s the reality check: while the quest itself is simple, Spaceport’s popularity makes it incredibly dangerous. This area consistently ranks as one of the most contested locations in the game, attracting players hunting for valuable loot and completing various missions.
Combat Preparedness: Even though you’re on a peaceful mission, come prepared for PvP encounters. Pack adequate healing supplies and ammunition for at least one engagement.
Timing Strategy: Consider completing this quest during off-peak hours when server population dips. Early morning or late-night sessions often provide safer windows.
Quick Extraction Plan: Before entering the tunnels, mentally map your extraction route. Know where you’ll head once the valve is turned—hesitation underground can be fatal.
Sound Discipline: The tunnels amplify footsteps and gunfire. Move deliberately and listen for approaching threats. Your ears are your best early warning system in confined spaces.
Why This Quest Deserves Priority
Beyond the immediate rewards, Switching the Supply teaches valuable lessons about ARC Raiders’ quest design. The game frequently rewards players who dare to venture into dangerous territories. This mission exemplifies the risk-reward balance that makes extraction shooters compelling—simple objectives in hostile environments create natural tension.
The quest also familiarizes you with Spaceport’s tunnel systems, knowledge that proves invaluable for future missions and escape routes during intense firefights. Understanding underground pathways gives you tactical advantages that pure combat skills cannot match.
For the latest ARC Raiders updates and community strategies, visit the official Embark Studios website to stay ahead of the competition.
Maximizing Your Spaceport Run
Since you’re already risking a trip to Spaceport, consider stacking multiple objectives. Check if you have other quests in the area, scout for high-tier loot in the Launch Towers, or gather crafting materials while you’re in the vicinity. Efficient raiders maximize every deployment, turning single-objective runs into multi-reward expeditions.
Frequently Asked Questions
Q: Can I complete the Switching the Supply quest solo, or do I need a squad?
A: This quest is perfectly manageable solo, and the underground tunnel actually provides some cover from surface threats. However, having a squad member watching the tunnel entrance while you turn the valve significantly reduces ambush risks. Solo players should move quickly and extract immediately after completion.
Q: What happens if another player turns the valve before I reach it?
A: Each player needs to interact with the valve individually to receive quest credit. The valve doesn’t disappear or become unavailable after one player uses it—multiple raiders can complete the objective from the same valve. However, be cautious when approaching if you see other players nearby, as not everyone follows peaceful protocols in contested areas.