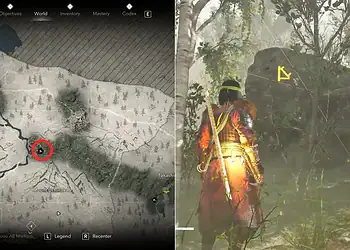
In ARC Raiders‘ brutal extraction shooter environment, the difference between extraction and elimination often comes down to one thing: shields. Whether you’re facing hostile ARC robots or enemy Raiders hunting your loot, proper shield management can save your life when bullets start flying. But here’s the catch—not all shields are created equal, and knowing when to craft, equip, or recharge them requires strategic thinking.
This guide breaks down everything you need to master shield mechanics in Embark Studios’ latest PvPvE shooter, from crafting recipes to emergency recharge tactics.
Table of Contents
ARC Raiders Shield Types: Quick Comparison
| Shield Type | Damage Mitigation | Movement Speed Penalty | Best Use Case |
|---|---|---|---|
| Light Shield | Low (Basic protection) | 0% (No penalty) | Solo exploration, speed-focused builds |
| Medium Shield | Moderate | -5% | Balanced gameplay, squad support |
| Heavy Shield | High (Maximum protection) | -15% | Tank roles, high-risk combat zones |
Understanding Shield Trade-Offs
The shield system in ARC Raiders forces meaningful tactical decisions. Higher-tier shields provide superior damage mitigation but impose significant movement penalties. That 15% speed reduction on Heavy Shields might not sound dramatic, but it dramatically affects your ability to escape dangerous situations or chase down targets.

Light Shields work perfectly for aggressive players prioritizing mobility over raw defense. You’ll dodge more bullets naturally while maintaining escape options.
Medium Shields strike the sweet spot for most players—reasonable protection without crippling your movement speed. The 5% penalty barely impacts gameplay while offering solid survivability.
Heavy Shields transform you into a walking fortress. Use them when holding objectives, defending extraction points, or tanking damage for your squad during intense firefights.
For more loadout optimization strategies, check our ARC Raiders best builds guide.
How to Craft Shields: Workshop Setup Required
Before crafting any shields, you must first establish the Gear Bench in your Workshop at Speranza. This crafting station unlocks access to shield recipes alongside augment blueprints.
Crafting Prerequisites:
- Unlock and upgrade your Workshop
- Build the Gear Bench station
- Gather necessary crafting materials (varies by shield tier)
- Reach the required player level for each shield type
Each shield tier unlocks progressively as you level up, encouraging natural progression rather than immediate access to top-tier gear. Materials typically include scrap metal, electronic components, and salvaged ARC technology—all found during topside expeditions.
Critical Reminder: Shields have limited durability that depletes with damage absorption. Always check shield condition before missions and repair anything below 20% durability to avoid mid-mission failures.
Shield Recharge Methods: Stay Protected Topside
Running out of shield charge during combat spells disaster. Fortunately, ARC Raiders offers multiple recharge options:
Craftable Quick-Use Tools
The most reliable method involves crafting shield recharge items at your Workshop. These portable tools restore shield capacity instantly during missions, providing emergency protection when you need it most.
Keep at least two recharge tools in your inventory for extended expeditions. They’re compact, effective, and can turn losing firefights into winning engagements.
Lootable ARC Remnants
Defeated ARC robots occasionally drop shield restoration items. While unreliable as your primary recharge method, these free pickups supplement your crafted supplies nicely.
Trading with Lance
If you’re short on crafting materials, visit trader Lance at Speranza. He sells shield recharge tools for Coins—the universal currency earned through successful extractions. While more expensive than crafting, purchasing recharges beats dying with empty pockets.
For comprehensive trading strategies and shop unlock guides, visit our ARC Raiders trader hub.
Pro Shield Management Tips
Prioritize Health Over Shields: If you’re critically wounded, use bandages before recharging shields. Shields protect future damage—they won’t save you if you’re already one bullet from death.
Weight Management Matters: Heavy shields affect stamina consumption and sprint duration. Factor this into your loadout alongside weapons and equipment.
Durability Checks: Make pre-mission inspections routine. A broken shield mid-combat offers zero protection regardless of charge level.
Squad Coordination: Designate roles based on shield types. Heavy shield users lead pushes while light shield players flank and scout.
For official game updates and community feedback, visit the Embark Studios website.
Frequently Asked Questions
Can I swap shields mid-mission if I find a better one?
Yes, shields can be swapped during missions if you find higher-tier alternatives in loot caches or from defeated enemies. However, switching shields doesn’t transfer remaining charge—your new shield starts at whatever capacity it has. If you’re switching from a damaged Light Shield to a fresh Medium Shield mid-combat, consider the timing carefully. Equip new shields during safe moments, not while under fire. Also remember that higher-tier shields impose movement penalties immediately, which might compromise your positioning if enemies are nearby.
What happens to my shield if I extract while it’s damaged?
Damaged shields persist between missions with their current durability value. If you extract with a shield at 15% durability, it remains at 15% when you start your next expedition. You must manually repair shields at your Workshop before deploying again. The repair system encourages proper gear maintenance rather than disposable equipment mentality. Smart Raiders check all equipment durability post-extraction, repair what’s needed, and restock consumables before the next topside adventure. Neglecting repairs leads to embarrassing shield failures during critical moments.