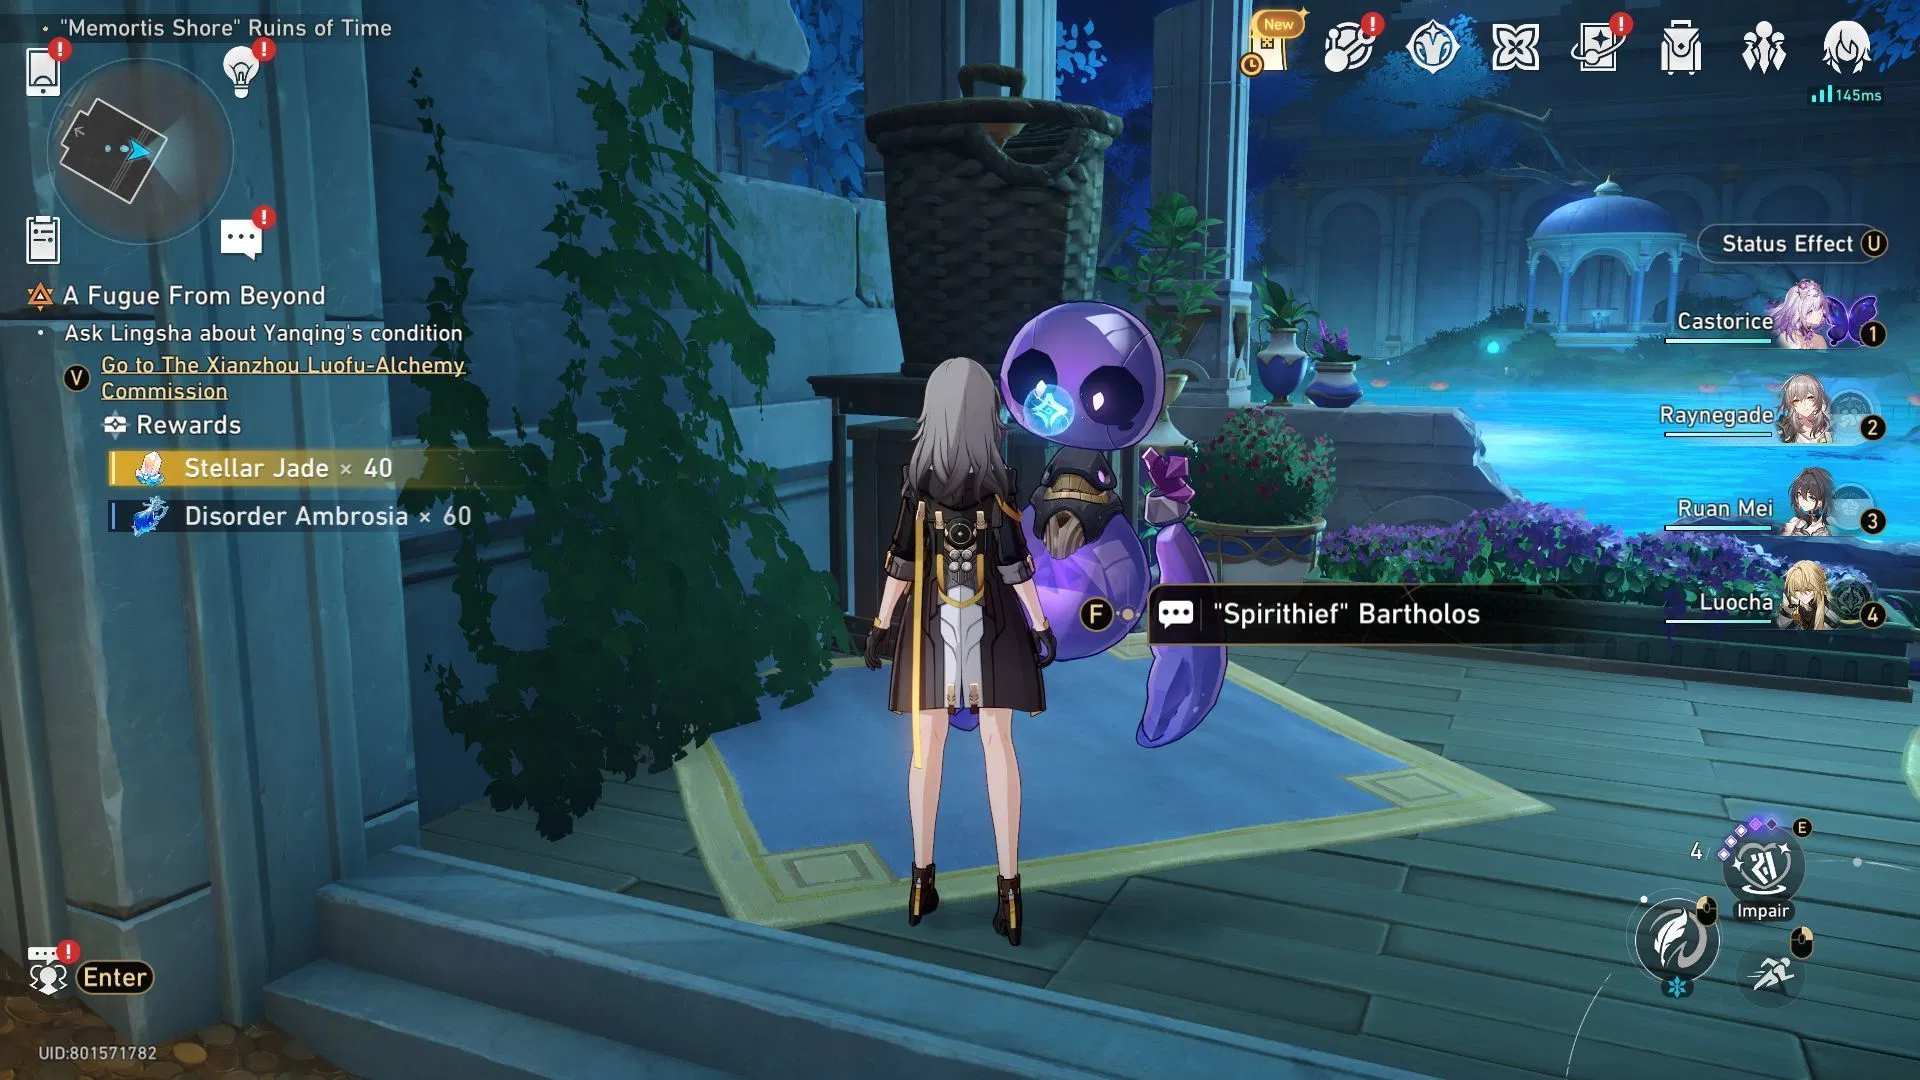
The mischievous Spirithief Bartholos returns in Honkai Star Rail’s version 3.7 update, hiding across the hauntingly beautiful Memortis Shore Ruins of Time. These elusive entities offer generous rewards—80 Stellar Jade and 120 Disorder Ambrosia combined—making them essential targets for Trailblazers exploring Amphoreus’s desolate landscapes.
Table of Contents
Why Honkai Star Rail Chase Spirithief Bartholos?
These thieving spirits aren’t just cute mascots—they’re walking treasure chests. Each Bartholos encounter nets you premium currency and valuable crafting materials without combat. Plus, capturing them unlocks exclusive achievements like “Place Where Wind Dwells” and “Tricky, Time, and Seeds,” adding completion percentage to your profile.
Complete Location Breakdown
| Location | Starting Point | Key Steps | Rewards |
|---|---|---|---|
| Secret Hideout | Falledge Terrace (B2) | Repair Golden Short Spear → Follow to window → Enter hideout | 40 Stellar Jade, 60 Disorder Ambrosia, Achievement |
| Sealed Prison | Sealed Prison of Despair (B3) | Take elevator → Cross void → Climb stairs → Interact with Ichor Vessel | 40 Stellar Jade, 60 Disorder Ambrosia, Achievement, Cognos Bloom |
Location 1: The Secret Hideout Mystery
Start your hunt at the Falledge Terrace Space Anchor on floor B2. Descend the nearby staircase and look for a damaged Golden Short Spear—interact to repair it. This magical artifact becomes your guide, floating toward Bartholos’s hiding spot.
When you encounter the Spirithief, it’ll flee dramatically through a window. Don’t panic! Simply interact with that same window to teleport into its cozy secret hideout. This unlocks the “Place Where Wind Dwells” achievement instantly. Chat with the cornered Bartholos to claim your 40 Stellar Jade and 60 Disorder Ambrosia.
Location 2: The Ichor Vessel Summon
The second Spirithief requires a more mystical approach. Teleport to Sealed Prison of Despair Space Anchor on floor B3. Board the nearby elevator to reach the next platform, then carefully traverse the void using available pathways.
After climbing the stairs, you’ll spot an Ichor Vessel—a mysterious artifact pulsing with energy. Interact with it and select the dialogue option “Help me, Bartholos” to summon the Spirithief directly. This clever trick skips the usual chase sequence entirely!
Complete the conversation to pocket another 40 Stellar Jade and 60 Disorder Ambrosia. As a bonus, this interaction unlocks the “Tricky, Time, and Seeds” achievement and grants access to a Cognos Bloom teleporter leading to upper floors.

Pro Hunting Tips
Navigate Memortis Shore’s multiple elevation levels carefully—both Spirithiefs hide on different floors (B2 and B3), making vertical awareness crucial. Enable waypoint markers to track your position relative to described locations.
Complete these collections during your initial exploration sweep to maximize efficiency. The rewards directly fund future Warp pulls, making every Bartholos encounter a step closer to your next five-star character.
Need more Amphoreus exploration strategies? Visit our Honkai Star Rail guides for character builds, event walkthroughs, and resource farming tips.
Discover more about version 3.7 updates on the official Honkai Star Rail website.
Frequently Asked Questions
Q: Do I need to complete the main story quest before finding Spirithief Bartholos in Memortis Shore?
A: Yes, you must progress through the version 3.7 story quest to unlock Memortis Shore Ruins of Time. The area becomes accessible during Amphoreus storyline progression, so prioritize completing story missions first.
Q: Can I return to catch Spirithief Bartholos later if I miss them during exploration?
A: Absolutely! Spirithief Bartholos locations remain permanent fixtures in Memortis Shore. You can return anytime after unlocking the area to collect your rewards—they don’t disappear or reset weekly.