
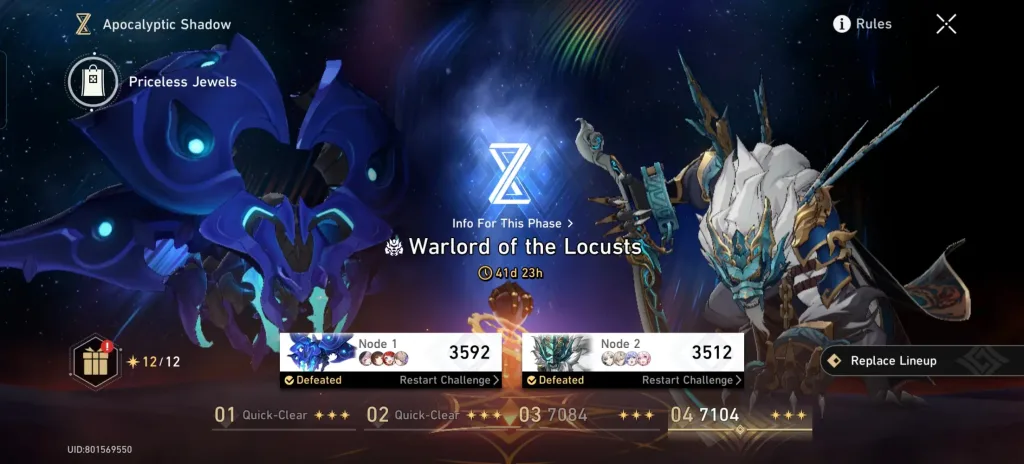
In the ever-expanding universe of Honkai Star Rail, where cosmic adventures and strategic battles intertwine, a new challenge has emerged to test even the most seasoned Trailblazers. The Apocalyptic Shadow, a pinnacle of endgame content, has been refreshed with its latest iteration: Warlord of the Locusts. This formidable challenge introduces two new bosses, the Sky-Shrouding Stardevourer Swarm and the Fulminating Wolflord, each bringing unique mechanics that will push your tactical prowess to its limits.
As the difficulty ramps up and the stakes grow higher, mastering this challenge becomes not just a test of strength, but a true measure of a Trailblazer’s strategic acumen. Whether you’re a veteran player looking to optimize your approach or a newcomer eager to tackle endgame content, this guide will equip you with the knowledge and strategies needed to emerge victorious against the Warlord of the Locusts.
Table of Contents
Honkai Star Rail 3.2: Decoding the Battlefield: Understanding Apocalyptic Shadow’s New Mechanics
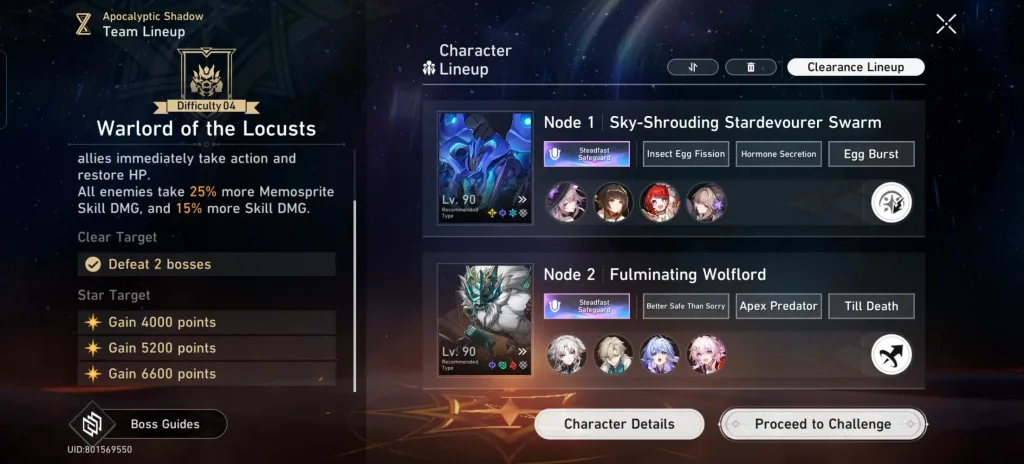
The Warlord of the Locusts challenge in Honkai Star Rail 3.2’s Apocalyptic Shadow introduces a series of stage buffs and unique mechanics that fundamentally alter the flow of battle. Let’s break down these crucial elements:
- Ruinous Embers: This overarching buff affects all four stages, offering a powerful advantage to players who can strategically break enemy weaknesses. When adversaries under “Steadfast Safeguard” are inflicted with Weakness Break, your entire team gets a chance to act immediately, regenerating HP and dealing increased damage.
- Insect Egg Fission: Starting from Stage 1’s Node One, this mechanic introduces a resource management aspect to the boss fight. The Boss Mirage accumulates Insect Eggs, which it can consume to enhance its Swarm summons.
- Better Safe Than Sorry: This Node Two mechanic from Stage 1 onwards adds a layer of strategy to dealing with Wolftroopers, eliminating them when specific conditions are met.
- Hormone Secretion and Apex Predator: These Stage 3 mechanics ramp up the challenge, automatically buffing Swarm summons and granting the boss extra turns in its second phase.
- Egg Burst and Till Death: The final stage introduces even more complexity, increasing the boss’s egg production and damage resistance during key phases of the fight.
Understanding these mechanics is crucial for crafting effective strategies and team compositions. The interplay between these buffs and debuffs creates a dynamic battlefield where adaptability and foresight are key to success.
Crafting the Perfect Team: Optimal Compositions for Each Node
Node One: Mastering the Swarm
For the first node, where AoE damage and summon management are crucial, two team compositions stand out:
- The Herta Dual-DPS Team
- The Herta (Main DPS)
- Jade (Secondary DPS)
- Sunday (Buffer)
- Aventurine (Shield Support)
This team excels in AoE damage, perfect for dealing with the boss’s summons while maintaining pressure on the main target. The synergy between The Herta and Jade’s Erudition Path abilities creates a devastating combo, while Sunday and Aventurine provide crucial support and survivability.
- Mydei Hypercarry Team
- Mydei (Main DPS)
- Luocha (Healer)
- Tribbie (Buffer)
- Sunday (Buffer)
For those without access to The Herta or Jade, this Mydei-focused team offers a powerful alternative. Mydei’s Destruction Path abilities provide strong AoE potential, while the support trio ensures he stays alive and deals maximum damage.
Node Two: Conquering the Wolflord
The second node introduces the unique “Going Solo” mechanic, requiring a different strategic approach:
- Castorice Hypercarry Team
- Castorice (Main DPS)
- Gallagher (Healer)
- Tribbie (Buffer)
- Remembrance Trailblazer (Buffer)
Castorice’s summon abilities give her a significant advantage during the “Going Solo” phases, making her an ideal choice for this node. The support characters ensure she’s well-buffed and healthy for these crucial 1v1 encounters.
- FUA (Follow-Up Attack) Team
- Feixiao (DPS)
- Topaz (DPS)
- Gallagher (Healer)
- Robin (Buffer)
Exploiting the Fulminating Wolflord’s weaknesses to Wind and Fire, this team focuses on devastating follow-up attacks. The synergy between Feixiao and Topaz, amplified by Robin’s buffs, creates a relentless assault that can quickly overwhelm the boss.
Mastering the Challenge: Strategic Tips for Success
- Buff Selection: Choose your pre-battle buffs wisely. “Knowledge and Decorum” for The Herta team, “No Turning Back” for Mydei, “Withered Tree’s Revival” for Castorice, and “Pursue and Eliminate” for the FUA team can significantly boost your performance.
- Resource Management: In Node One, pay close attention to the boss’s Insect Egg accumulation. Time your AoE attacks to clear summons efficiently while maintaining damage on the main boss.
- Going Solo Preparation: For Node Two, always have your main DPS ready for the “Going Solo” phase. Ensure they’re well-buffed and at full health before these crucial 1v1 encounters.
- Elemental Exploitation: Particularly in Node Two, leverage the boss’s weaknesses to Wind and Fire. Proper elemental team composition can dramatically speed up the fight.
- Summon Synergy: When using characters like Castorice, time your summons to maximize their effectiveness during both regular and “Going Solo” phases.
EA FC25 Defensive Driven Evolution: Unlock Your Backline’s True Potential
FAQs
Q: How often does the Apocalyptic Shadow challenge refresh?
A: The Apocalyptic Shadow challenge typically refreshes every major update, which is approximately every 6 weeks. However, the Warlord of the Locusts iteration in version 3.2 may have a different duration, so it’s best to check the in-game announcements for the most accurate information.
Q: Are there any rewards for completing all stages of the Warlord of the Locusts challenge?
A: Yes, completing all stages of the Apocalyptic Shadow: Warlord of the Locusts challenge offers significant rewards. These typically include Stellar Jade, upgrade materials, and exclusive cosmetic items. The exact rewards can vary, but they are generally some of the most valuable in the game, making this challenge highly worthwhile for endgame players.