

That mysterious voice echoing across Moonveil Mountain isn’t just atmospheric flavor—it’s your gateway to one of Where Winds Meet’s most elaborate puzzles. The Cries in the Distance quest combines climbing challenges, Yin-Yang puzzles, and an unexpected bear boss fight that’ll test your newly-learned Tai Chi skills. Let’s rescue Brother Feng and escape with all the loot intact!
Table of Contents
Where Winds Meet: Overview at a Glance
| Aspect | Details |
|---|---|
| Quest Type | Lost Chapter (Side Quest) |
| Location | Peace Bell Tower, Moonveil Mountain, Qinghe |
| Quest Giver | Feng Jisheng (trapped NPC) |
| Requirements | Fire arrows, basic Tai Chi skill |
| Main Puzzle | Eight Trigrams formation (Yin-Yang dial) |
| Boss Fight | Enraged Black Bear |
| Rewards | 3 treasure chests, experience, materials |
| Connected Landmark | Bell of Demoncalm |
| Difficulty | Medium (climbing + puzzle-solving) |
Finding the Quest: Follow the Voice
Head to Moonveil Mountain in Qinghe and locate the Peace Bell Tower landmark (also called Bell of Demoncalm). If you’ve followed the main story to the Porcelain Kiln area where you first meet Killerblade, you’ve been here before.

The climb to the pagoda is steep—use Lightness skill if unlocked to save time, or carefully find rest ledges during traditional climbing. Once at the top, activate Wind Sense to pinpoint the cry’s direction.
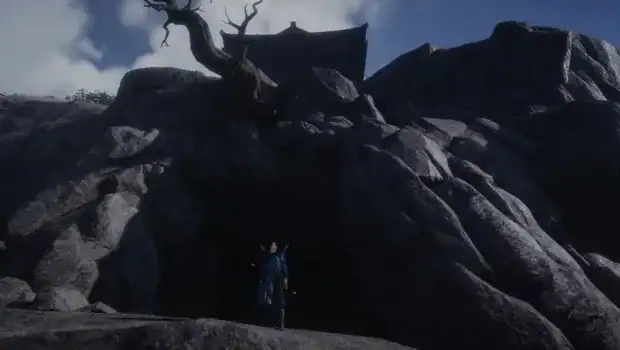
Critical Detail: The quest doesn’t start inside the pagoda itself. Walk out the entrance, face outward, and look for a thick tree branch jutting from the cliff. Drop down carefully to find a hidden cave entrance below the branch. There’s a treasure chest on the ledge beside the tree—grab it before entering!
For more navigation tips and Lightness skill unlocking, check our Where Winds Meet beginner’s guide.
Entering the Cave: Burn and Press
Inside the cave, follow the tunnel until vines block your path. Equip fire arrows and burn the brambles to proceed. You’ll reach a chamber with Feng Jisheng trapped behind stone walls and a massive Yin-Yang Tai Chi disc carved into the floor.
Find the pressure plate near the trapped NPC and stand on it to release him. Feng will explain the dangerous Yin-Yang formation and warn you about getting too close. Grab the nearby chest while you’re here—free loot is always worth collecting!
Solving the Eight Trigrams Puzzle
Here’s where many players get stuck. The chamber features four smaller pillars surrounding the central Yin-Yang disc, each representing elemental forces: Heaven, Earth, Water, and Fire. Dragon heads stick out from each pillar, and your job is rotating them to create the correct energy flow.
The Solution:
- Identify the pillars – Heaven and Earth on one axis, Water and Fire on another
- Heaven & Earth alignment – Rotate these so dragon heads face AWAY from each other, with mist flowing into the Yin-Yang disc
- Water & Fire alignment – Rotate these so dragon heads face TOWARD each other, creating opposing elemental tension
- Verify the pattern – Mist should visibly flow from all four pillars into the central disc
When correctly aligned, the Tai Chi disc opens, revealing a lower chamber. Use Mighty Drop to descend safely—don’t just jump or you’ll take fall damage!
The Bear Boss: Tai Chi Throwing Technique
This isn’t your standard “whittle down the HP bar” boss fight. The Enraged Black Bear can’t be defeated through normal attacks—you must use Tai Chi throwing skills to crash it into three stone piles scattered around the arena.
Strategy:
- Lure the bear near one of the three rock piles
- Activate Tai Chi when the bear attacks or charges
- Aim the throw directly at the pile of stones
- Repeat three times – once for each pile
Successfully throwing the bear into all three piles defeats it instantly and causes the piles to collapse, revealing three treasure chests hidden underneath. Loot all three before proceeding!
Pro Tip: If you’re struggling with Tai Chi timing, practice the mechanic on regular enemies first. The window is tighter than dodge rolls, but more forgiving than perfect parries.
For more combat fundamentals and skill mechanics, explore our Where Winds Meet combat guide.
Wrapping Up: Report to Feng
After looting the bear arena, find Feng Jisheng and inform him the danger has been dealt with. He’ll express gratitude, the quest completes, and you’re free to explore the rest of Peace Bell Tower.
Don’t Miss: The same area hosts the Horizon Seeker achievement for climbing to the absolute top of the pagoda. If you’re an achievement hunter, now’s the perfect time to grab it since you’re already here!
Connecting to the Bell of Demoncalm
The Peace Bell Tower where this quest occurs connects to broader Qinghe exploration. The Bell of Demoncalm itself sits atop the tower and ties into the Lion’s Roar Mystic Skill unlock, which requires ringing copper bells scattered across the region.
While Cries in the Distance is entirely separate from the bell-ringing mechanic, completing both activities in one visit maximizes efficiency. The tower serves as a vertical exploration showcase demonstrating Where Winds Meet’s climbing systems and environmental storytelling.
For comprehensive location guides and collectible tracking, visit the official Where Winds Meet wiki maintained by the community.
Why This Quest Matters Beyond Rewards
Cries in the Distance teaches essential mechanics you’ll need later: precision climbing under pressure, complex environmental puzzles requiring observation rather than combat, and creative boss strategies that break traditional “attack until dead” patterns.
The Tai Chi throwing mechanic introduced here becomes crucial for advanced martial arts paths and certain story missions. Mastering it now saves frustration down the line when the game expects you to already understand these systems.
The quest also showcases NetEase’s environmental design philosophy—hidden areas beneath obvious landmarks, rewarding thorough exploration, and integrating cultural elements like Yin-Yang philosophy into gameplay mechanics rather than just visual theming.
Common Mistakes to Avoid
Rushing the climb: Take your time ascending Moonveil Mountain. Falling from great heights wastes time and potentially requires potion usage before the boss fight.
Ignoring Wind Sense: Don’t randomly search for the cave entrance. Wind Sense points you directly to the hidden platform, saving minutes of aimless cliff-diving.
Wrong pillar alignment: Double-check dragon head directions before assuming the puzzle is broken. The solution requires Heaven/Earth facing away while Water/Fire face toward each other—mixing these up is the most common error.
Fighting the bear normally: Don’t waste resources trying to kill it through standard attacks. The game explicitly teaches Tai Chi throwing for this encounter—use it!
Frequently Asked Questions
Q: I’ve completed the main Cries in the Distance quest, but can I return to the cave later for additional exploration or loot respawns?
Yes, you can return to the cave beneath Peace Bell Tower after completing the quest, but don’t expect loot respawns—the three chests from the bear fight remain looted permanently. However, revisiting makes sense if you missed the pressure plate chest during your first run or want to screenshot the beautiful Yin-Yang chamber for personal collections. The cave also serves as a quiet area for roleplaying or testing combat mechanics without enemy interference. Some players return specifically to practice Tai Chi throwing timing on the respawning wildlife outside the cave entrance, using the familiar environment as a training ground.
Q: Is the Cries in the Distance quest required for main story progression, or can I skip it entirely and come back later?
Cries in the Distance is a completely optional Lost Chapter side quest—skipping it has zero impact on main story progression or region unlocks. However, “optional” doesn’t mean “unimportant” in Where Winds Meet. The quest teaches Tai Chi throwing mechanics that appear in later story missions where the game assumes you’ve already learned them. Completing it early prevents confusion when those mechanics suddenly become mandatory without tutorial prompts. Additionally, the experience points, materials, and chest loot provide meaningful early-game boosts. You can return anytime since the quest has no level locks or story gates, but tackling it during your natural Qinghe exploration flow feels most organic and rewarding.


