The Minecraft Derivative Shaders has become one of the most beloved shader packs in the community, offering players an extraordinary way to transform their vanilla worlds into stunning cinematic landscapes. With its unique blend of realism and atmospheric effects, this shader pack strikes the perfect balance between visual enhancement and gameplay performance. Here’s your complete guide to installing and optimizing these game-changing shaders.
Table of Contents
Minecraft Derivative Shaders Overview
| Feature | Details |
|---|---|
| Compatibility | Minecraft 1.21.8, 1.21, 1.20.1, 1.19.2+ |
| Required Mod | OptiFine or Iris Shaders |
| Performance Impact | Medium (Optimized for survival gameplay) |
| Key Features | Thick fog, realistic shadows, wind effects |
| Presets Available | Default, Survival, Film |
| PBR Support | Yes (Physically Based Rendering) |
| POM Compatible | Yes (Parallax Occlusion Mapping) |
Why Choose Derivative Shaders?
Cinematic Visual Identity
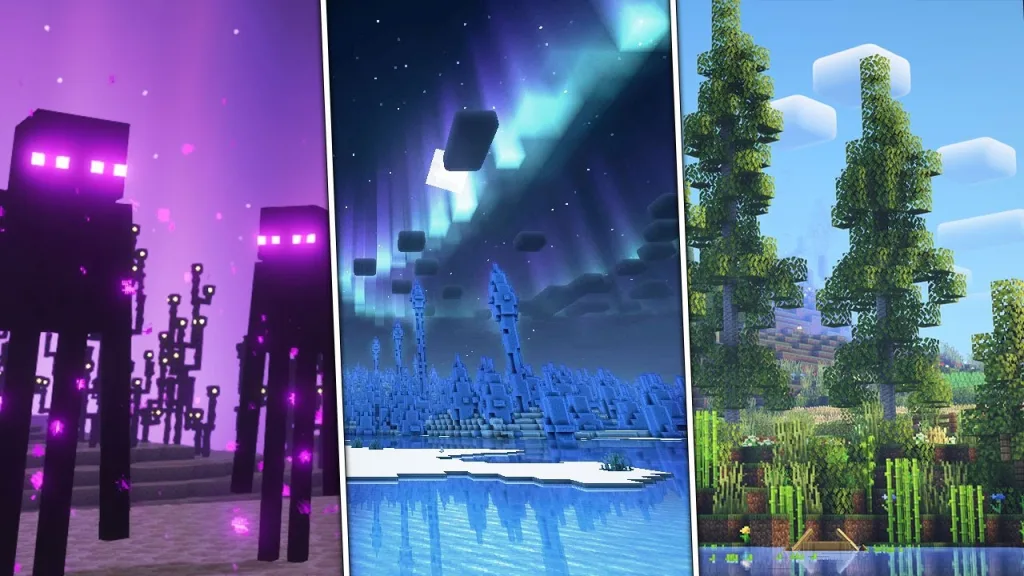
The Minecraft Derivative shaders is a unique shader pack that offers a distinct visual identity, transforming the vanilla look into a cinematic beauty. What sets Derivative apart from other shader packs is its carefully curated approach – it cherry-picks features and styles from popular packs, implementing iconic color grading and 3D texture that gives the world a cinematic and ethereal look.
Performance-Focused Design
The Derivative Shaders are a fantastic alternative for anyone looking to make their Minecraft more realistic and atmospheric without putting too much strain on their PC! Unlike resource-heavy alternatives, it aims to provide a comfortable gameplay experience by making it more realistic while maintaining smooth performance.
Step-by-Step Installation Guide
Prerequisites
Before installing Derivative Shaders, ensure you have:
- OptiFine or Iris Shaders installed (OptiFine recommended for wider compatibility)
- Minecraft version 1.21.8, 1.20.1, or compatible versions
- A graphics card capable of shader rendering
Installation Process
Step 1: Download Required Files
- Download the latest OptiFine version for your Minecraft installation
- Download Derivative shaders from a repository of your choice and keep it handy
Step 2: Install OptiFine
- Run the OptiFine installer and select your Minecraft directory
- Launch Minecraft with the OptiFine profile
Step 3: Install Derivative Shaders
- Open an instance of Minecraft with Optifine installed
- Navigate to Options → Video Settings → Shaders
- Click on the Shaders Folders tab to open the directory where the shaders are stored
- Simply drag and drop the downloaded Derivative shaders ZIP file into this folder
- Important: Do not unzip the ZIP file and place it as is in the target directory
Post-Installation Tips
It might take a while for the pack to get implemented, resulting in temporary stuttering — it is normal and there is no need to shut the game down.
Key Features and Visual Effects
Atmospheric Enhancements
Signature Effects:
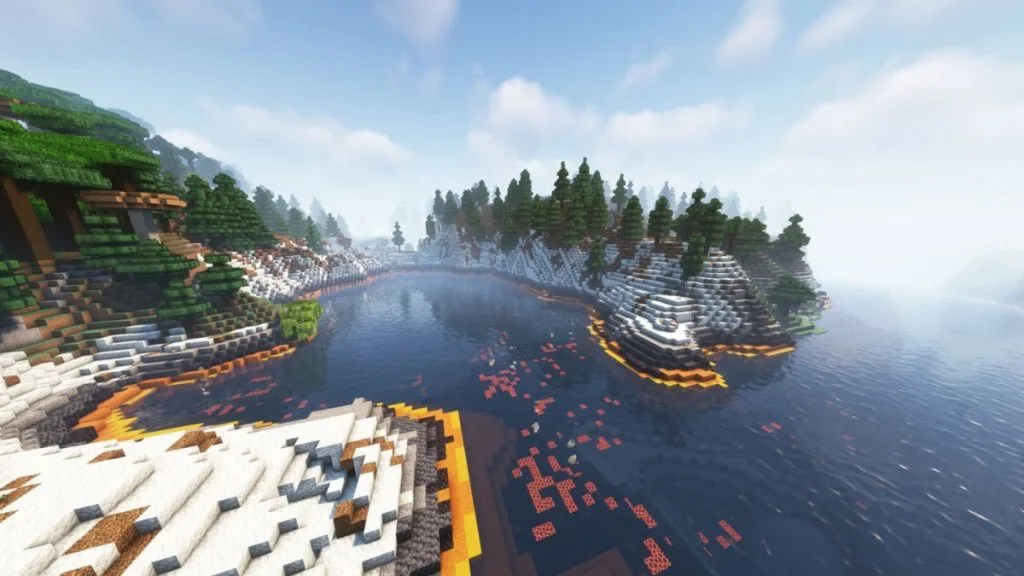
- Thick, immersive fog – Creates atmospheric depth and realism
- Movement of leaves and grass in the wind – Dynamic environmental interactions
- Realistic shadows – Enhanced lighting system
- Depth of field effect – Cinematic focus blur
Three Distinct Presets
Default Preset: Offers the iconic dreamy look with full atmospheric effects
Survival Preset: Customized to offer better visibility and improved shadows, ensuring you can spot mobs and blocks without being hindered by the enhanced looks
Film Preset: Imparts a warm and nostalgic look to the sandbox title
Advanced Compatibility Features
Enhanced Texture Support
The shader is compatible with PBR and POM packs, ensuring it can be used alongside custom resource packs for better texture and looks. This allows for:
- Physically Based Rendering (PBR) – Realistic material properties
- Parallax Occlusion Mapping (POM) – Enhanced texture depth
Mod Integration
The pack is also compatible with the Distant Horizons and Physics mods, ensuring better rendering and interactions in the game.
Performance Optimization Tips
System Requirements
Minimum Specs:
- GPU: GTX 1050 / RX 560 or equivalent
- RAM: 8GB (with 4GB allocated to Minecraft)
- CPU: Intel i5-6400 / AMD Ryzen 3 1200
Recommended Settings:
- Start with Survival preset for better performance
- Adjust render distance based on your system capabilities
- Use Fast graphics for lower-end systems
Troubleshooting Common Issues
- Stuttering: Normal during initial loading; allow time for optimization
- Low FPS: Switch to Survival preset or reduce render distance
- Compatibility Issues: Ensure OptiFine version matches your Minecraft version
Comparison with Popular Alternatives
| Feature | Derivative | BSL Shaders | SEUS PTGI |
|---|---|---|---|
| Performance Impact | Medium | Medium-High | Very High |
| Fog Effects | Excellent | Good | Limited |
| Survival Friendly | Yes | Moderate | No |
| Cinematic Look | Excellent | Good | Excellent |
Conclusion
The Minecraft Derivative Shaders represents a perfect fusion of visual enhancement and practical gameplay considerations. With Derivative Shaders, the gameplay looks like it’s straight out of a Minecraft movie. Everything feels incredibly realistic. Whether you’re exploring vast landscapes, building magnificent structures, or simply enjoying a peaceful sunset, these shaders transform every moment into a cinematic experience.
The three preset options ensure that every player can find their ideal balance between visual fidelity and performance. From the atmospheric Default preset to the gameplay-optimized Survival mode, Derivative Shaders adapts to your needs without compromising on the stunning visual improvements that make Minecraft feel like an entirely new game.
Ready to transform your Minecraft world? Download Derivative Shaders today and experience the perfect blend of beauty and functionality that has made this shader pack a community favorite.
Discover more Minecraft enhancement guides and shader recommendations on TechnoSports Gaming. Follow our Minecraft section for comprehensive mod reviews and PC Gaming for optimization tutorials.
FAQs
Q1: How do I install Minecraft Derivative Shaders and what are the requirements?
A: To install Derivative Shaders, you need OptiFine or Iris Shaders installed first (OptiFine recommended). Download the shader pack as a ZIP file, then in Minecraft go to Options → Video Settings → Shaders → Open Shader Packs Folder, and drag the ZIP file directly into this folder without extracting it. The shaders are compatible with Minecraft 1.21.8, 1.21, 1.20.1, and older versions. Initial loading may cause temporary stuttering, which is normal as the game optimizes the new visual effects.
Q2: What makes Derivative Shaders different from other Minecraft shader packs?
A: Derivative Shaders stands out for its unique cinematic visual identity that balances realism with gameplay performance. It features three distinct presets: Default (dreamy atmospheric look), Survival (optimized visibility for gameplay), and Film (warm nostalgic appearance). Key features include thick immersive fog, realistic wind-blown vegetation, enhanced shadows, and depth of field effects. The shader is also compatible with PBR/POM texture packs and mods like Distant Horizons, making it highly versatile while maintaining comfortable performance for survival gameplay.