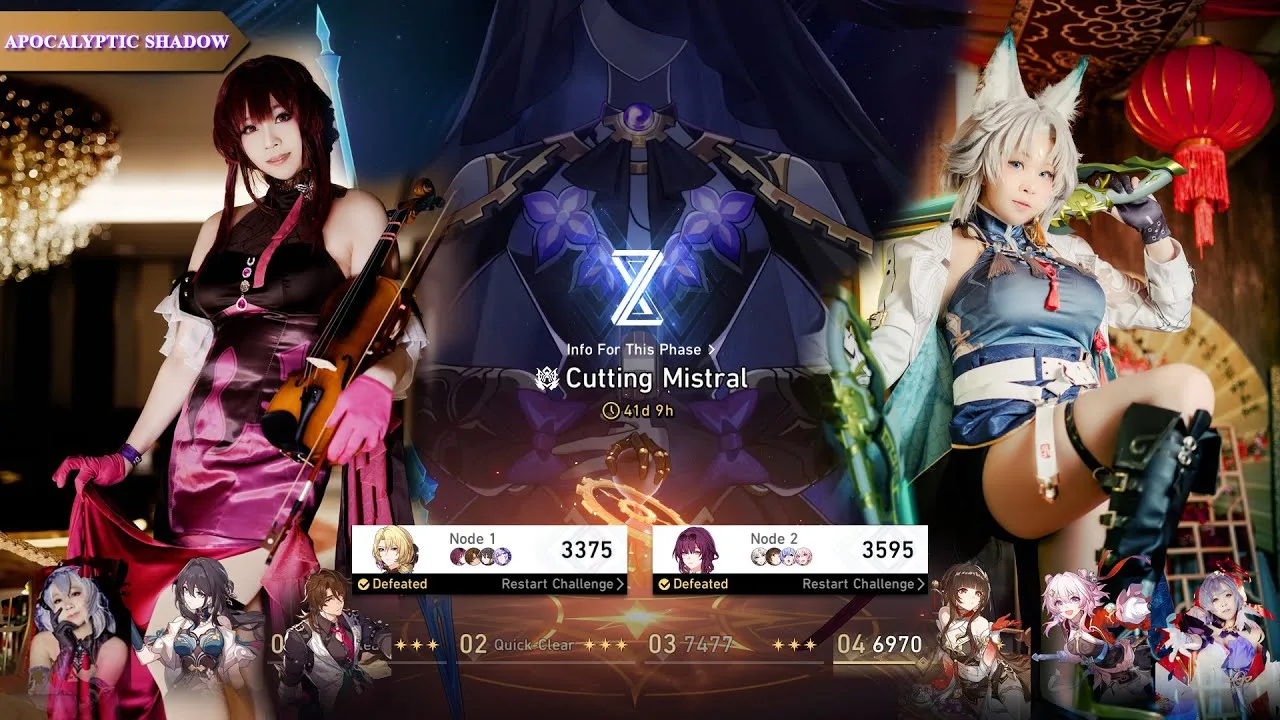
The Apocalyptic Shadow has returned with a vengeance in Honkai Star Rail 3.3, bringing with it the challenging Cutting Mistral domain that tests even veteran Trailblazers’ tactical prowess. This endgame content represents one of the game’s most demanding yet rewarding challenges, requiring careful team building, strategic buff selection, and intimate knowledge of boss mechanics. Unlike standard combat encounters, Cutting Mistral pits players against formidable opponents Cocolia and Kafka, each with unique phases and mechanics that demand specialized approaches.
Success hinges not just on raw character power but on synergistic team compositions that exploit enemy weaknesses and maximize the potential of available buffs. This guide breaks down everything you need to know to conquer all stages of the Cutting Mistral challenge, from optimal buff selections to boss-specific strategies and recommended team compositions for each node. Whether you’re struggling with Cocolia’s Ice Edge mechanics or Kafka’s damage reduction phases, we’ve got you covered with detailed strategies that will help you claim all available rewards from this rotation of Apocalyptic Shadow.
Table of Contents
Understanding Apocalyptic Shadow Buffs: The Foundation of Your Strategy
The cornerstone of any successful Apocalyptic Shadow run lies in selecting the right buffs to complement your team composition. Each node offers three distinct buffs, and choosing the one that synergizes with your characters can dramatically impact your performance.

Node 1 Buffs Analysis
For the first node featuring Cocolia as the final boss, you have three powerful options to consider:
- Memosprite Enhancement: This buff increases Weakness Break Efficiency of all memosprites by 50% and allows them to ignore 20% of the target’s DEF when dealing damage. This is particularly potent for characters like Castorice who rely heavily on their memosprites for damage output.
- DoT Amplification: When attacking Weakness Broken enemies, all DoT effects currently applied will immediately inflict damage equal to 80% of their original value. This effect can trigger twice per character in a single turn, making it ideal for DoT-focused teams featuring characters like Kafka and Black Swan.
- Ultimate Damage Boost: CRIT DMG dealt by Ultimates receives a 30% increase, with an additional 30% DMG boost when targeting Weakness Broken enemies. This buff shines with characters who rely on powerful Ultimate abilities, such as Acheron.
Node 2 Buffs Analysis
For the second node featuring Kafka, your options include:
- Physical Damage Enhancement: Increases Physical DMG of all allies by 50% and restores 20% HP whenever a character uses their Skill. This is perfect for Physical damage dealers like Yunli and Clara.
- Follow-up Attack Improvement: Follow-up ATK DMG ignores 15% of the target’s All-Type RES and can reduce Toughness even without targeting weaknesses. The Toughness reduction equals 50% of the original modifier, making this ideal for follow-up attack specialists like Feixiao and Topaz.
- Break Damage and Speed Boost: Increases Break DMG taken by all enemies by 10% and boosts all allies’ SPD by 20% for two turns after triggering Weakness Break. This synergizes well with Break-focused characters like Firefly.
Selecting the right buff requires understanding your team’s strengths and the mechanics of the upcoming battle. For example, if you’re running Castorice as your main DPS in Node 1, the Memosprite Enhancement buff will significantly increase your damage output.

Boss Mechanics and Strategies: Knowing Your Enemy
Conquering Cocolia in Node 1
Cocolia, the Annihilator of Desolation Mistral, presents a multi-phase challenge with specific weaknesses to Quantum, Wind, Lightning, and Fire damage. Understanding her mechanics is crucial for victory:
Phase 1 Strategy:
- Cocolia summons an Ice Edge that deals periodic damage if not destroyed
- Prioritize destroying the Ice Edge first to unlock Cocolia’s weakness
- Once her weakness is exposed, focus your damage on Cocolia herself
- Save your strongest Ultimate abilities for when she’s Weakness Broken
Phase 2 Strategy:
- Gepard joins the battle and can shield Cocolia
- Target Gepard first to eliminate his shielding capabilities
- With Gepard defeated, focus on breaking Cocolia’s weakness again
- Unleash your stored Ultimate abilities for maximum damage

| Cocolia’s Weaknesses | Recommended Elements | Priority Targets |
|---|---|---|
| Phase 1 | Quantum, Wind, Lightning, Fire | Ice Edge → Cocolia |
| Phase 2 | Quantum, Wind, Lightning, Fire | Gepard → Cocolia |
Defeating Kafka in Node 2
Kafka, the Soulhook Sovereign, has weaknesses to Imaginary, Physical, Wind, and Fire DMG. Her battle also unfolds in multiple phases:
Phase 1 Strategy:
- Kafka spawns additional enemies and takes 50% less damage until her Toughness Bar is broken
- Eliminate the additional enemies first to make breaking her Toughness easier
- Once her Toughness is broken, she becomes vulnerable to full damage
- Hold your Ultimate abilities until after breaking her Toughness
Phase 2 Strategy:
- Similar to Phase 1 but with tougher additional enemies
- Prioritize the additional enemies again
- Break Kafka’s Toughness to remove her damage reduction
- Unleash your stored Ultimate abilities for maximum damage
| Kafka’s Weaknesses | Recommended Elements | Priority Targets |
|---|---|---|
| Phase 1 | Imaginary, Physical, Wind, Fire | Additional Enemies → Kafka |
| Phase 2 | Imaginary, Physical, Wind, Fire | Additional Enemies → Kafka |
Understanding these boss mechanics allows you to approach each battle with a clear strategy, focusing on the right targets at the right time to maximize your damage output and minimize the threat posed by these formidable opponents.
Optimal Team Compositions: Building for Success
The right team can make all the difference in Apocalyptic Shadow. Here are the most effective compositions for each node, along with explanations of why they work so well.
Top Teams for Node 1 (Cocolia)
1. Castorice + Remembrance Trailblazer + Tribbie + Hyacine
This team excels with the Memosprite Enhancement buff, as Castorice’s memosprite becomes a devastating damage dealer. Remembrance Trailblazer provides valuable support, while Tribbie offers additional damage and utility. Hyacine, as the newest healer, provides optimal sustain specifically designed to complement Castorice.
Alternative options: If you don’t have Hyacine, Luocha or Gallagher can serve as substitute healers. Ruan Mei can replace Tribbie if needed.
2. Aglaea + Sunday + Remembrance Trailblazer + Huohuo
This team leverages Aglaea’s powerful damage output with support from Sunday and Remembrance Trailblazer. Huohuo provides healing and energy regeneration to keep the team’s Ultimates charged.
3. Kafka + Black Swan + Tribbie + Huohuo
Perfect for the DoT Amplification buff, this team stacks damage-over-time effects that trigger additional damage when attacking Weakness Broken enemies. Kafka and Black Swan create a powerful DoT synergy, while Tribbie adds utility and Huohuo keeps the team healthy.
Top Teams for Node 2 (Kafka)
1. Feixiao + Topaz + Robin + Aventurine
This team maximizes the Follow-up Attack Improvement buff. Feixiao serves as the main DPS with Topaz providing sub-DPS through follow-up attacks. Robin is essential for any follow-up attack team, while Aventurine offers shielding and support.
2. Boothill + Fugue + Ruan Mei + Lingsha
Boothill provides consistent damage output, supported by Fugue’s utility. Ruan Mei enhances the team’s break capabilities, and Lingsha offers healing and additional support.
3. Firefly + Harmony Trailblazer + Ruan Mei + Lingsha
This team excels with the Break Damage and Speed Boost buff. Firefly specializes in break damage, while Harmony Trailblazer, Ruan Mei, and Lingsha provide support, debuffs, and healing respectively.
| Node | Team Composition | Recommended Buff | Key Strength |
|---|---|---|---|
| Node 1 | Castorice + Remembrance Trailblazer + Tribbie + Hyacine | Memosprite Enhancement | Maximizes Castorice’s memosprite damage |
| Node 1 | Aglaea + Sunday + Remembrance Trailblazer + Huohuo | Memosprite Enhancement | Strong single-target damage with support |
| Node 1 | Kafka + Black Swan + Tribbie + Huohuo | DoT Amplification | Stacks and amplifies DoT effects |
| Node 2 | Feixiao + Topaz + Robin + Aventurine | Follow-up Attack Improvement | Maximizes follow-up attack damage |
| Node 2 | Boothill + Fugue + Ruan Mei + Lingsha | Break Damage and Speed Boost | Consistent damage with break support |
| Node 2 | Firefly + Harmony Trailblazer + Ruan Mei + Lingsha | Break Damage and Speed Boost | Specializes in break damage |
These team compositions are designed to exploit the specific mechanics of each node and boss, while also taking full advantage of the available buffs. By selecting the right team for each challenge, you significantly increase your chances of success.

Execution Tips: Maximizing Your Performance
Even with the right team and buffs, proper execution is crucial for conquering Apocalyptic Shadow. Here are some advanced tips to help you maximize your performance:
Energy Management
- Save your Ultimates for when enemies are Weakness Broken to maximize damage
- Use energy regeneration skills strategically to ensure your DPS characters have their Ultimates ready at critical moments
- Consider the energy requirements of your team when selecting buffs
Target Prioritization
- Always focus on the correct targets as outlined in the boss strategies
- For Cocolia, destroy the Ice Edge first, then focus on Cocolia
- For Kafka, eliminate additional enemies before focusing on breaking her Toughness
Buff Synergy
- Select buffs that complement your team’s strengths
- If using a Castorice team, prioritize the Memosprite Enhancement buff
- For DoT teams with Kafka or Black Swan, choose the DoT Amplification buff
- Follow-up attack teams with Feixiao or Topaz benefit most from the Follow-up Attack Improvement buff
Weakness Breaking
- Time your attacks to break weaknesses efficiently
- Use characters with the appropriate elements to target boss weaknesses
- Save your strongest attacks for after breaking an enemy’s weakness
By applying these execution tips alongside the recommended team compositions and buff selections, you’ll be well-equipped to tackle the challenges of Apocalyptic Shadow Cutting Mistral and claim all available rewards.
Rewards and Progression: Why Apocalyptic Shadow Matters
Completing Apocalyptic Shadow challenges provides valuable rewards that contribute significantly to your account’s progression. The rewards typically include:
- Self-Modeling Resin for crafting and upgrading Relics
- Tracks of Destiny for obtaining characters
- Credits for various upgrades
- Stellar Jade for wishing on banners
The difficulty increases across the four stages of each Apocalyptic Shadow rotation, with corresponding increases in rewards. Successfully clearing all stages provides substantial resources that can accelerate your progress in other aspects of the game.
Investing time in mastering Apocalyptic Shadow is worthwhile not only for the immediate rewards but also for the practice it provides in team building and combat strategy, skills that transfer to other challenging content in Honkai Star Rail.
How to Get Fortnite on iPhone in the EU: The Complete 2025 Guide for Gamers
FAQs
What are the best F2P-friendly teams for Apocalyptic Shadow Cutting Mistral?
For players with limited character options, several F2P-friendly teams can still perform effectively in Apocalyptic Shadow. For Node 1, consider using Qingque as your main DPS, supported by Xueyi, Remembrance Trailblazer, and Lynx. This team can take advantage of the Ultimate Damage Boost buff, with Qingque dealing significant damage through her Ultimate. For Node 2, a team featuring Dan Heng, March 7th (Imaginary), Asta, and Natasha can work well with the Break Damage and Speed Boost buff.
Dan Heng provides consistent single-target damage, while March 7th offers protection, Asta speeds up the team, and Natasha keeps everyone healthy. While these teams may require more investment in terms of Light Cones and Relics compared to premium teams, they can still clear the content with proper execution and strategy. Remember to focus on targeting the correct enemies in each phase and timing your Ultimate abilities for maximum impact when bosses are Weakness Broken.
How often does Apocalyptic Shadow reset, and what changes between rotations?
Apocalyptic Shadow resets with each major version update in Honkai Star Rail, typically every six weeks. The current Cutting Mistral domain was introduced with version 3.3 and will remain until the 3.4 update. Each rotation features different bosses, buffs, and challenges, requiring players to adapt their strategies and team compositions. The domain name, enemy lineup, and available buffs all change between rotations, keeping the content fresh and challenging.
While the fundamental mechanics of Apocalyptic Shadow remain consistent—selecting buffs, defeating bosses across multiple stages with increasing difficulty—the specific strategies required evolve with each rotation. This regular refresh encourages players to build diverse character rosters and experiment with different team compositions rather than relying on a single approach. If you’re struggling with the current rotation, remember that a new set of challenges with different enemies and buffs will arrive with the next update, potentially better suited to your available characters.