


How to Take a Screenshot on a Chromebook: A Complete Guide
Chromebooks have become increasingly popular, especially in educational settings, due to their affordability and user-friendly interface. If you’re a Google Chromebook user, you may find yourself needing to capture what’s on your screen for various reasons, such as troubleshooting, sharing information, or documenting your work.
All About Taking Screenshot on a Chromebook
Method 1: Using the Keyboard Shortcut
Chrome OS comes equipped with a convenient keyboard shortcut to capture screenshots quickly. Follow these steps:

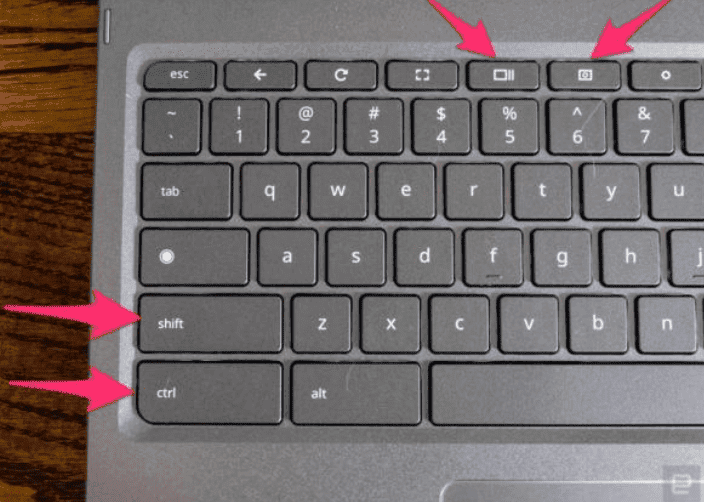
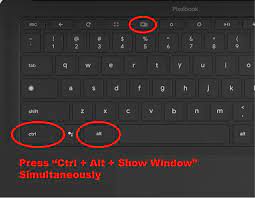
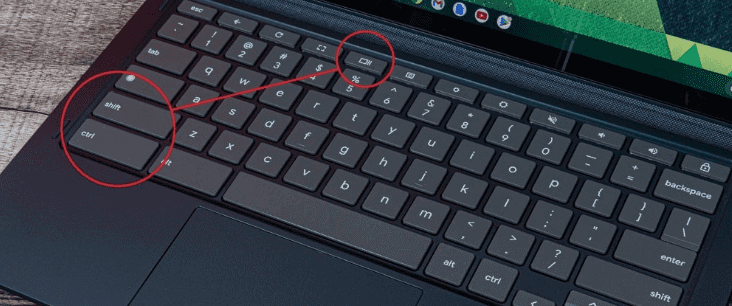
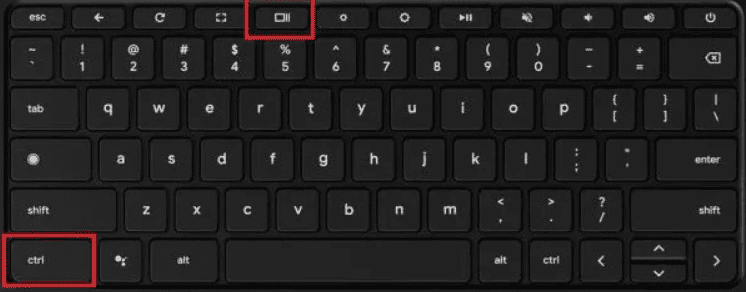
Press the Keys
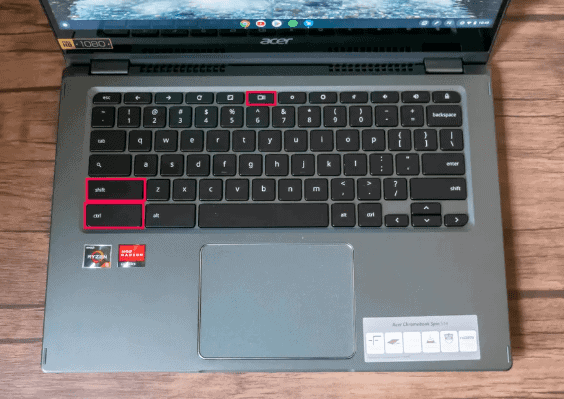
- On your Chromebook keyboard, locate the following keys: Shift + Ctrl + Show. A rectangle icon next to two vertical lines frequently serves as the Show key’s visual representation.
- If your Chromebook has an external keyboard without a dedicated Show key, press Shift + Ctrl + F5 as an alternative.

Access the Menu
- After pressing the keyboard shortcut, a menu will appear at the bottom of your screen.
Select Screenshot Type
- Choose the type of screenshot you want to capture:
- Full-screen screenshot
- Partial screenshot (select a specific area)
- Window screenshot (capture a specific window)
Capture
- Click on the appropriate option to take a screenshot on a Chromebook.
Method 2: Utilizing the Screen Capture Tool in Quick Settings
Introduced in Chrome OS 89, Google added a screen capture tool to the Quick Settings menu, offering an alternative method

Open Quick Settings
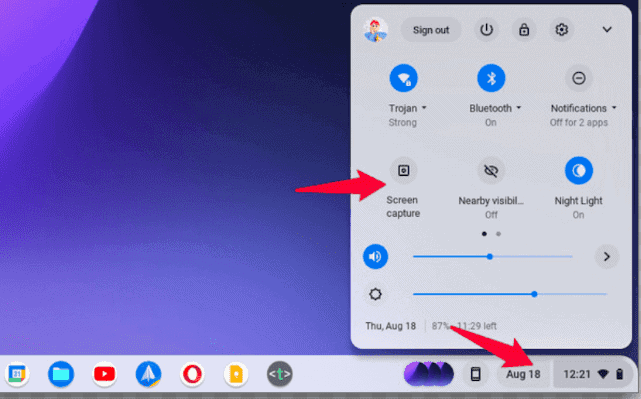
- Located at the bottom right of your screen, click on the time to access the Quick Settings menu.
Select Screen Capture
- Within the Quick Settings menu, select the “Screen Capture” option.
Choose Capture Settings
- Ensure that the content you want to capture is currently displayed on your screen.

Choose the type of capture
- Fullscreen
- Single window
- Part of your screen
- Optionally, you can select to record some or all of your screen.

Click Capture
- Click on the “Capture” button to initiate the screenshot or screen recording.
Generalized Approach
FAQs
How can I take a screenshot of my entire screen?
here are two keyboard shortcuts for capturing your whole Chromebook screen:
Press and hold the “Ctrl” key, then tap the “Show windows” key (which looks like a rectangle with two vertical lines on the right side) and the “3” key at the same time. (This method might not work on all Chromebooks. See option 2 if that’s the case)
Alternatively, press and hold the “Shift” key, “Ctrl” key, and “3” key all together.
My Chromebook doesn’t have a “Show windows” key. How can I take a screenshot?
If your Chromebook keyboard lacks a dedicated “Show windows” key, you can use this shortcut instead:
Press and hold the “Ctrl” key, then press and hold the “Shift” key, and tap the “F5” key once. Finally, release all three keys.