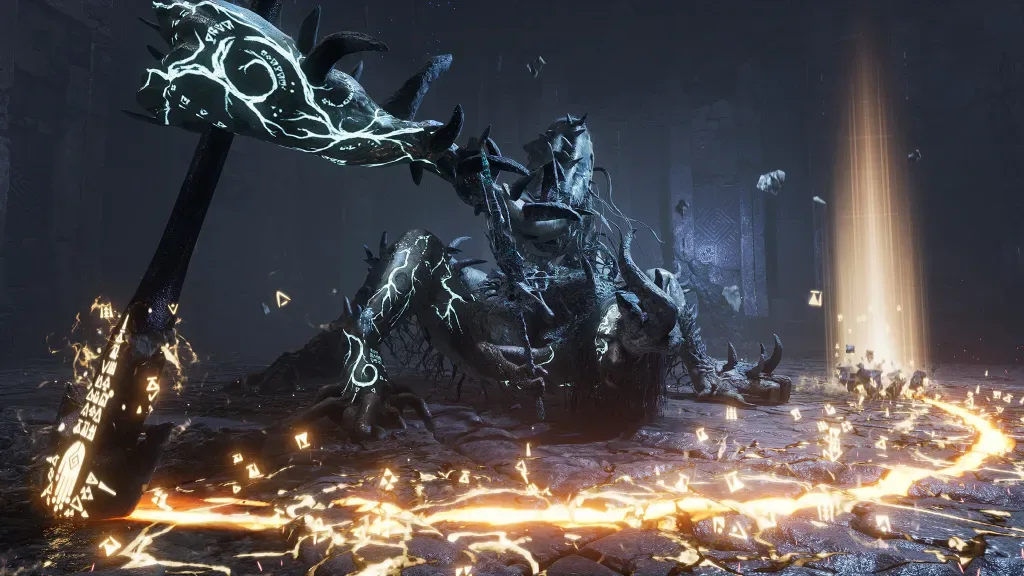
The Anguished Guardian of the Ruins stands as one of the most formidable and memorable boss encounters in Lies of P Overture, representing a pinnacle of challenge that tests every skill players have developed throughout their journey. This colossal adversary combines the intimidating presence of classic dragon-type bosses with the precise mechanical demands that define the souls-like genre, creating an encounter that feels both familiar and refreshingly unique.
The fight demands not only technical proficiency in timing and positioning but also strategic understanding of elemental weaknesses and resource management that separates successful players from those who struggle repeatedly against this imposing foe.
Table of Contents
What makes the Anguished Guardian particularly compelling is its dynamic combat system that evolves throughout the encounter, introducing new attack patterns and environmental hazards that keep players constantly adapting their approach. The boss’s erratic movement patterns and unpredictable timing windows create a unique challenge that cannot be overcome through memorization alone, requiring genuine skill development and tactical flexibility that rewards patient, observant players while punishing hasty or careless approaches.
Understanding this encounter’s intricacies becomes essential not only for progression but also for unlocking the coveted secret achievement that acknowledges mastery of one of the DLC’s most significant challenges.
The key to success lies in recognizing that this battle rewards preparation, patience, and precise execution rather than aggressive rushing or brute force tactics, making it a perfect example of how Lies of P Overture elevates the traditional boss fight formula through thoughtful design and meaningful player choice consequences.
Essential Pre-Battle Preparation: Optimizing Your Build for Victory
Success against the Anguished Guardian begins long before entering the arena, requiring careful consideration of equipment selection, resource allocation, and strategic preparation that maximizes your chances of victory. The boss’s significant weakness to fire damage creates clear optimization opportunities that smart players can exploit through proper weapon selection and enhancement choices. The Flamberge Legion Arm emerges as the optimal choice for this encounter, offering both the elemental advantage and the area-of-effect capabilities necessary to target multiple weak points simultaneously during critical damage windows.
Weapon selection becomes crucial when facing an opponent with such a substantial health pool and specific elemental vulnerabilities. Fire-based weapons that scale effectively with your character build provide the foundation for efficient damage output, while complementary amulets that enhance fire damage, reduce ability cooldowns, or improve defensive capabilities can make the difference between victory and defeat. The investment in Legion Magazines becomes particularly important, as the Flamberge’s special abilities will prove essential for maximizing damage during the brief vulnerability windows that define this encounter’s rhythm.
Character positioning and movement preparation deserve equal attention to equipment optimization, as the Anguished Guardian’s arena presents unique spatial challenges that require awareness of environmental factors and positioning opportunities. Understanding the boss’s movement patterns and attack ranges before engaging allows players to develop instinctive positioning responses that become crucial when facing the intense pressure of active combat. The availability of Spectre summoning provides an additional strategic option for players who prefer cooperative approaches or need extra support to manage the encounter’s demanding timing requirements.

Mastering Phase One Combat: Close-Range Tactics and Perfect Guard Timing
The opening phase of the Anguished Guardian encounter establishes the fundamental rhythm and tactical approach that will determine success throughout the entire battle. Maintaining close proximity to the boss emerges as the most effective strategy, despite the increased risk this positioning entails, because it maximizes damage output opportunities while limiting the boss’s ability to utilize its most devastating ranged attacks. However, this aggressive positioning requires mastery of the Perfect Guard and dodge timing systems, as the margin for error becomes significantly reduced when operating within the boss’s immediate threat range.
The boss’s erratic behavioral patterns create unique challenges for players accustomed to more predictable enemy attack sequences, demanding adaptability and quick decision-making rather than rote memorization of timing windows. While Perfect Guarding remains theoretically optimal for maximizing counterattack opportunities, the unpredictable nature of the Anguished Guardian’s attack timing makes dodging a more reliable defensive option for most players. The key lies in recognizing which attacks present reliable Perfect Guard opportunities versus those that require evasive maneuvering to avoid devastating damage.
The red body slam attack represents the most important Perfect Guard opportunity in the first phase, as successfully parrying this assault creates extended vulnerability windows where significant damage can be inflicted safely. Learning to recognize the telegraphing signals for this attack while maintaining aggressive positioning requires practice and patience, but the payoff in terms of damage output and fight momentum makes this skill essential for efficient victory. The dual lock-on system targeting both the head and claws provides strategic flexibility in damage application, allowing skilled players to maximize the Flamberge’s area-of-effect potential by positioning to strike multiple target zones simultaneously.
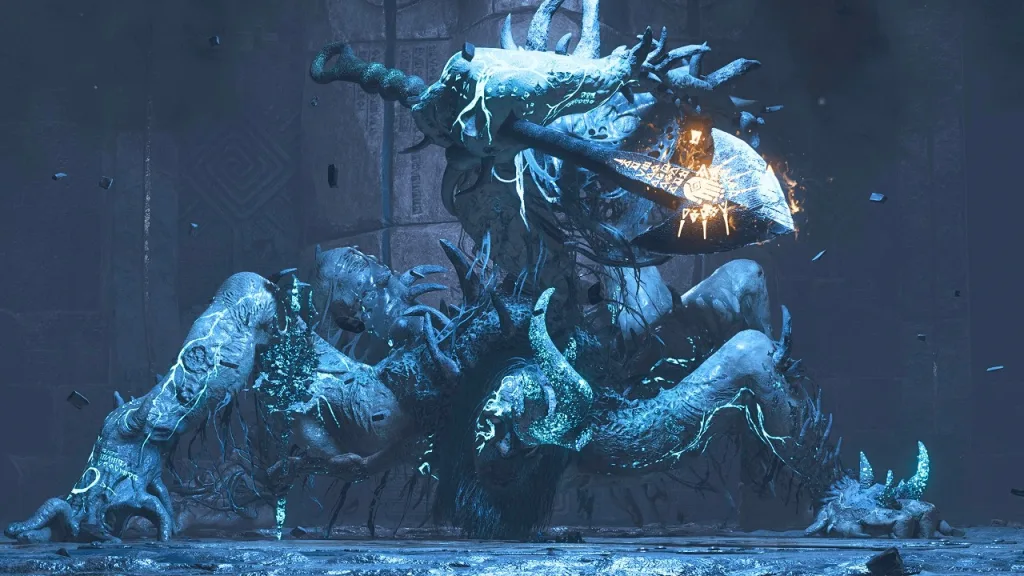
Advanced Phase Two Mechanics: Laser Attacks and Environmental Hazards
The transition into the Anguished Guardian’s second phase introduces significantly more complex mechanics that test players’ ability to adapt their established strategies while managing new threats and environmental hazards. The addition of laser attacks creates dynamic positioning challenges that require real-time decision-making based on visual cues and pattern recognition, as the boss employs two distinct laser variations that demand different positioning responses for optimal safety and damage output.
Understanding the directional telegraphing system becomes crucial for surviving the laser attacks, as the boss’s head positioning indicates the beam’s travel direction and allows prepared players to position themselves advantageously before the attack executes. The back-to-front laser variation requires maintaining distance from the right claw while still positioning for immediate counterattack opportunities, creating a delicate balance between safety and aggression that defines high-level play in this encounter. Conversely, the left-to-right laser demands close positioning to the same claw, demonstrating how the same safe zone serves different tactical purposes depending on the specific attack variation being employed.
The area-of-effect sword slam represents another significant escalation in the encounter’s mechanical complexity, introducing environmental damage that cannot be avoided through positioning alone. This attack tests players’ defensive option usage and resource management, as successfully blocking reduces damage significantly compared to taking the attack undefended, while healing efficiently afterward becomes essential for maintaining the aggressive positioning necessary for optimal damage output. The timing and positioning required to minimize damage from this attack while maintaining offensive pressure exemplifies the encounter’s demand for simultaneous defensive and offensive awareness.
Critical Damage Windows and Stagger Exploitation
Maximizing damage output against the Anguished Guardian requires understanding and exploiting the specific vulnerability windows that occur throughout the encounter, particularly the stagger states that provide extended opportunities for safe, high-damage attacks. The stagger system rewards players who successfully Perfect Guard the red body slam attack consistently, creating predictable opportunities for significant damage application that can dramatically reduce the encounter’s overall duration and resource requirements.
However, the stagger animation itself presents unique dangers that inexperienced players often overlook, as the boss’s collapse animation can still inflict damage to carelessly positioned players. This mechanical detail emphasizes the importance of maintaining tactical awareness even during apparent victory moments, as premature celebration or positioning errors during stagger states can result in unnecessary damage or missed opportunities. The optimal approach involves positioning strategically during the stagger setup to maximize safety while ensuring immediate access to high-value target zones once the vulnerability window opens.
The Flamberge’s special ability becomes particularly valuable during stagger states, as the extended vulnerability duration allows for full ability execution without interruption risk. Targeting priority during these windows should focus on the highest-damage potential zones, typically the head or claws depending on positioning and accessibility, while maintaining awareness of the stagger duration to avoid being caught in vulnerable positions when the boss recovers. Understanding these timing relationships transforms stagger opportunities from brief damage windows into decisive encounter-shaping moments that reward skilled execution with substantial progress toward victory.
Frequently Asked Questions
What makes the Anguished Guardian’s attack patterns so difficult to predict, and how can players develop consistent defensive responses?
The Anguished Guardian’s erratic behavior stems from its unique AI programming that incorporates deliberate timing variations and movement unpredictability, designed to prevent players from relying solely on memorized response patterns. Unlike traditional souls-like bosses that follow strict timing windows, this encounter features adaptive elements that respond to player positioning and aggression levels, creating dynamic combat scenarios where the same attack sequence might execute with different timing or positioning based on battlefield conditions. Players can develop consistency by focusing on visual and audio cues rather than strict timing memorization, learning to recognize the physical telegraphing signals that precede each attack type while maintaining flexible positioning that allows for multiple defensive responses. The key lies in developing pattern recognition skills that identify attack categories rather than specific timing windows, enabling reactive responses that adapt to the boss’s erratic behavior while maintaining offensive pressure and positioning advantages.
How should players balance offensive aggression with defensive positioning when exploiting the boss’s fire weakness during stagger windows?
Optimal balance between offense and defense during the Anguished Guardian encounter requires understanding the relationship between damage windows, positioning safety, and resource management throughout the extended fight duration. Players should prioritize establishing and maintaining close-range positioning that maximizes fire damage output while ensuring immediate access to defensive options when attack telegraphing occurs, rather than attempting to maximize damage through reckless positioning that compromises survival chances. During stagger windows specifically, the optimal approach involves positioning to target high-value zones like the head or claws with the Flamberge’s fire-based abilities while maintaining awareness of the stagger duration and recovery timing to avoid being caught in vulnerable positions.