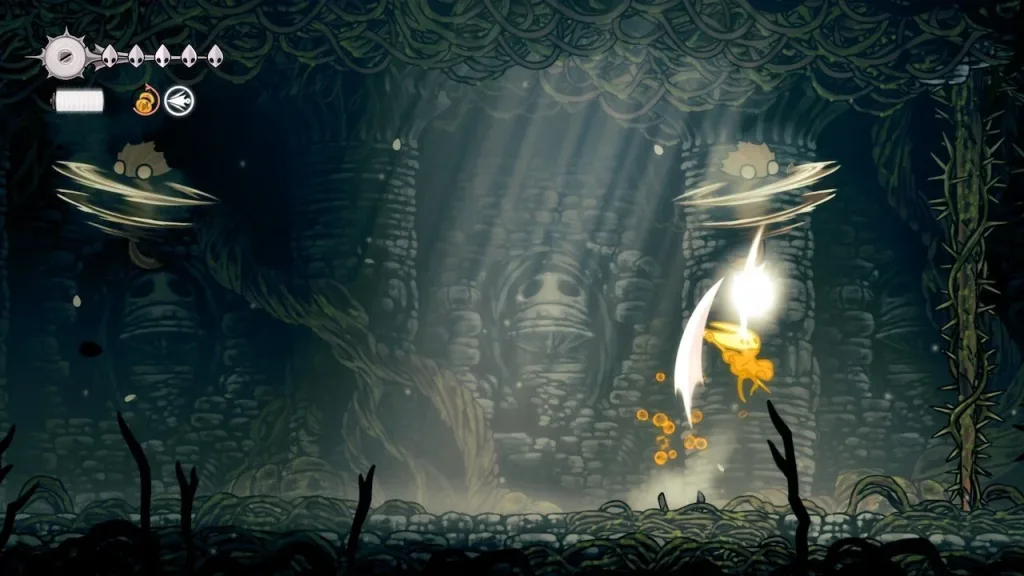
Sister Splinter stands as one of Hollow Knight: Silksong’s most challenging early-game bosses, serving as the first true skill check for players venturing through Shellwood. This intimidating arachnid warrior will test your combat fundamentals and introduce key mechanics that define Silksong’s intense boss battles.
Table of Contents
Hollow Knight Sister Splinter Overview & Location
Sister Splinter is located in the Shellwood area of Pharloom, accessible after activating the central lift and heading right through a series of platforming challenges. This boss encounter marks a significant difficulty spike that prepares players for the increasingly complex battles ahead.
Boss Fight Essential Information
| Element | Details |
|---|---|
| Location | Shellwood area |
| Difficulty | High (Early game skill check) |
| Key Ability | Silkspear (Essential for victory) |
| Main Challenge | Managing Splinterbark adds |
| Strategy Focus | Aggressive, fast-paced combat |
Pre-Fight Preparation
Essential Equipment
Before challenging Sister Splinter, ensure you have the Silkspear ability equipped. This ability is crucial for the fight, as it provides a one-hit kill against Splinterbark enemies that Sister Splinter summons throughout the battle.
Recommended Tools:
- Flea Brew: Obtained after completing the Lost Fleas quest, provides temporary advantages
- Additional Mask Shards: Increase survivability for this challenging encounter
- Upgraded weapons: Any combat improvements help significantly
Phase 1: Initial Combat Pattern
Basic Attack Strategy
At the beginning of the fight, Sister Splinter uses only one attack – the claw attack, which is easy to dodge. Since the boss strikes with right and left hands repeatedly, dodge to the left if she’s attacking with her right arm and dodge to the right if she’s using her left arm.
This positioning gives you more space to attack between her strikes and helps you maintain offensive pressure.
Key Phase 1 Tips:
- Stay Aggressive: Playing defensively will get you overwhelmed
- Destroy Splinters: Break arena obstacles if movement feels restricted
- Consistent Damage: Focus on regular attacks to build up Silkspear charges
Phase 2: Stun Opportunities
Maximizing Damage Windows
Once you hit her several times, she will get stunned and fall to the ground. Keep hitting her with normal attacks while she is on the ground and save your Silkspear ability for what comes next.
When she rises, there’s a critical 5-6 second window where she won’t attack, allowing for significant damage before she summons adds.
Critical Phase: Managing Splinterbarks
The Make-or-Break Moment
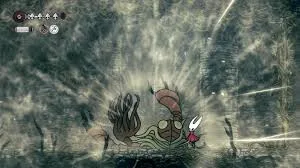
As she rises up again, this is a key opportunity to attack her as much as possible since she won’t do anything for five or six seconds. After striking her until she shrieks, she spawns two mobs called Splinterbarks.
Splinterbark Elimination Strategy
Use the Silkspear ability (R1 button on PS5 controller) to kill the two Splinterbarks. It’s a one-hit kill – you can even kill both mobs with one strike, but that’s harder since you need to avoid the first Splinterbark attack and get them both to one part of the arena.
Advanced Technique: Positioning both Splinterbarks for a single Silkspear strike is ideal but not required. Using two separate Silkspear attacks works perfectly fine.
Advanced Combat Strategies
Arena Management
Splinter Destruction: Once she fills up the room with those huge splinters, destroy those in the middle, as that’s where you’ll find it easier to fight her due to the splinters on the edges of the arena.
Positioning Tips:
- Central arena area provides best maneuverability
- Edge splinters can provide cover but limit movement options
- Clear only necessary obstacles to maintain fighting space
Ability Management
You need to constantly attack the boss to build the bar for Silkspear attacks, as these are key in managing the fight. Resource management becomes crucial as the battle intensifies.
Energy Conservation:
- Use regular attacks to build Silkspear charges
- Reserve Silkspear exclusively for Splinterbark elimination
- Maintain aggressive pressure to charge abilities quickly
Late Fight Patterns
Repeated Phases
From that point, the boss will reappear and continue with its claw attacks. She will also continue spawning Splinterbarks, so get rid of them as soon as they appear. Sometimes she’ll spawn only one mob, making it easier to deal with.
Victory Conditions: You’ll have to stun the boss four or five times to beat it.
Common Mistakes to Avoid
Defensive Play Pitfalls
Sister Splinter punishes passive strategies ruthlessly. Players who retreat and wait for openings often get overwhelmed by adds and increasingly aggressive attack patterns.
Silkspear Mismanagement
Wasting Silkspear charges on Sister Splinter instead of Splinterbarks leads to unmanageable add accumulation, making the fight exponentially harder.
Arena Neglect
Failing to manage arena splinters creates movement restrictions that limit dodge options and attack opportunities.
Rewards and Progression
Defeating Sister Splinter grants access to the Cling Grip ability, essential for progression through Shellwood and into Upper Bellhart. This wall-climbing ability opens new areas and movement options crucial for future exploration.
The victory also provides valuable combat experience with Silksong’s boss fight mechanics, preparing players for even more challenging encounters ahead.
Tips for Struggling Players
Practice Fundamentals
Focus on mastering basic dodge timing and attack windows before attempting advanced strategies. Sister Splinter’s early attacks provide excellent practice opportunities.
Exploration Benefits
Complete available side quests and exploration before challenging Sister Splinter. Additional tools and upgrades significantly impact fight difficulty.
Pattern Recognition
Study Sister Splinter’s attack telegraphs carefully. Her movements provide clear indicators for dodge timing and counter-attack opportunities.
The key to victory lies in maintaining aggressive pressure while efficiently managing Splinterbark spawns through precise Silkspear usage.
Beyond Sister Splinter
Success against this boss indicates readiness for Silksong’s more complex encounters. The aggressive combat philosophy and add management skills learned here apply throughout the Hollow Knight Silksong experience.
Sister Splinter’s defeat unlocks progression toward The Widow and other formidable bosses that await in Pharloom’s deeper regions, each building upon the fundamental skills this encounter teaches.
Master more challenging bosses and advanced combat techniques in our comprehensive Hollow Knight: Silksong combat guide.
Frequently Asked Questions
Q: What is the most important ability needed to beat Sister Splinter in Hollow Knight: Silksong?
A: The Silkspear ability is absolutely essential for beating Sister Splinter. This ability provides a one-hit kill against the Splinterbark enemies that Sister Splinter summons throughout the fight. Without it, managing the adds becomes nearly impossible, making the fight exponentially more difficult.
Q: Where do I find Sister Splinter in Hollow Knight: Silksong and what strategy works best?
A: Sister Splinter is located in Shellwood after activating the central lift and heading right. The best strategy is aggressive, fast-paced combat while saving Silkspear charges exclusively for killing Splinterbarks. Dodge her claw attacks by moving opposite to her attacking arm, and focus on stunning her 4-5 times to achieve victory.