How to Screenshot on Mac: The Best Guide in 2024
In our digital era, the ability to capture and share what’s on our screens is as vital as the content itself. Whether it’s sharing work instructions, capturing an inspiring design, or preserving an important conversation, knowing how to take screenshots on a Mac can make your life significantly easier.
This comprehensive guide will walk you through various methods of taking screenshots on your Mac, from keyboard shortcuts to the built-in Screenshot app. Let’s dive in!

How to Screenshot on Mac: Keyboard Shortcuts for Screenshot
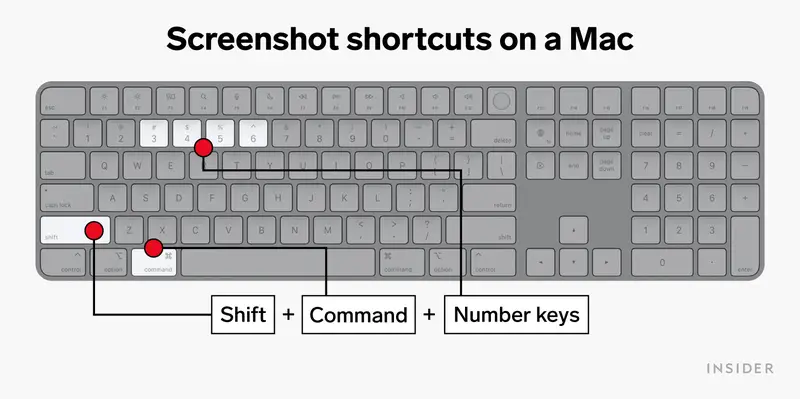
macOS has a variety of keyboard shortcuts for screenshots, each tailored to different needs. Here’s how you can use them:
1. Capturing the entire screen: Press `Command (⌘) + Shift + 3`. Your Mac will capture the entire screen, including your dock.
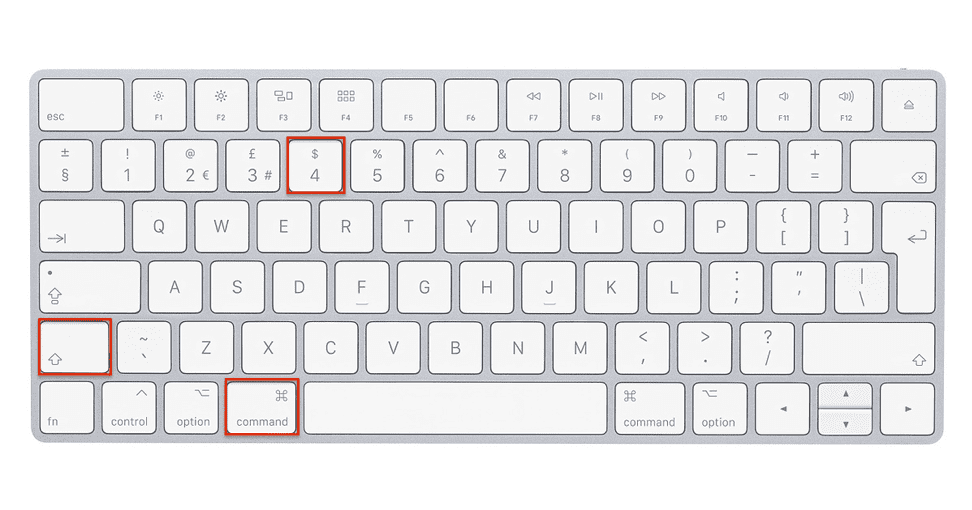
2. Capturing a specific portion of the screen: Press `Command (⌘) + Shift + 4`. Your cursor will turn into a crosshair. Click and drag to select the area you want to capture. Release the mouse or trackpad button to snap the screenshot.
3. Capturing a window or menu: Press `Command (⌘) + Shift + 4`, then press `Spacebar`. Your cursor will turn into a camera icon. Hover over the window or menu you want to capture and click.
Using the Screenshot App
macOS Mojave (10.14) and later versions also include a handy Screenshot app offering more customization options. Here’s how to use it:
Saving and Locating Screenshots
By default, Mac saves screenshots to your desktop. They will have the word “ScreenShot” after the date and time of capture. However, you may want to change the default location to avoid cluttering your desktop.
- Press `Command (⌘) + Shift + 5` to open the screenshot app.
- Click on `Options`.
- Under ‘Save to’, choose your preferred location.
- Capture your screenshot. It will be saved to the location you just selected.
Editing Screenshots
Once you’ve snapped your screenshot, you might want to annotate it or crop out unnecessary parts. Mac has built-in tools for this:
- Immediately after taking a screenshot, a thumbnail will appear in the corner of your screen.
- Click on this thumbnail to open the screenshot in markup view.
- Here, you can add text, shapes, or even your signature. You can also crop the image by dragging its edges.
- Click `Done` to save your edits.
Other Mac Shortcuts
While you’re mastering screenshots, you might find these other Mac shortcuts useful:
- `Command (⌘) + C`: Copy
- `Command (⌘) + V`: Paste
- `Command (⌘) + Z`: Undo
- `Command (⌘) + S`: Save
Screen Recording on Mac
In addition to screenshots, Mac also allows you to record your screen. This can be particularly helpful for creating tutorials or recording video calls. To do this, simply press `Command (⌘) + Shift + 5` and select the ‘Record’ option from the toolbar.
Conclusion
Knowing how to take a screenshot on a Mac is a fundamental skill for any user. With the tips and steps outlined in this guide, you’ll be able to capture your screen like a pro, whether you need a simple snapshot or a customized screenshot. Remember, the best way to become comfortable with these methods is to try them out and see what works best for you. Happy screenshotting!
FAQs
How do I take a screenshot of my entire screen?
Press and hold these three keys together: Shift, Command, and 3. The screenshot will be saved to your desktop.